Credit From: http://www.mustbegeek.com/configure-external-and-internal-url-in-exchange-2013/
Configure External and Internal URL in Exchange 2013
Before configuring the URLs, we need to plan the domain names that will be used to access the mail server. https://mail.mustbegeek.com/ is the domain name that will used from both internal and external network in our case. Similarly, https://mail.mustbegeek.com/ecp/ is the domain name that will be used by administrators to access EAC console. The mail.mustbegeek.com CNAME recored is added in both internal DNS server and public DNS server as well. It’s easier for users if external and internal URL is same because they don’t have to remember multiple domain names for same purpose. But you can also configure different internal and external URLs. Let’s configure URLs for each services step by step.
Open Exchange Admin Center. Click servers on the features pane. Click virtual directories tab. This is where you configure most of the URL’s of the virtual directories.
Step 1: Outlook Web Access
Outlook web access virtual directory is the directory that users access while logging into their mailboxes. Double-click owa (Default Web Site) and change the URLs.
Now users will need to type, https://mail.mustbegeek.com/owa in their browser to access their mailboxes.
Step 2: Exchange Control Panel (ecp) or Exchange Admin Center
ECP virtual directory is accessed by administrators to configure the Exchange server. Double-click ecp (Default Web Site) and configure the URLs.
Now administrator needs to browse https://mail.mustbegeek.com/ecp to log in Exchange Admin Center.
Step 3: ActiveSync
Exchange ActiveSync is used by mobile clients and devices to synchronize mails, contacts, calendar, etc. Double-click Microsoft-Server-ActiveSync (Default Web Site) and configure the URLs.
Step 4: Offline Address Book (OAB)
OAB virtual directory is used to distribute offline address book for mailbox users. The address book is distributed to user’s office outlook application so that users can use the address book even when they are not connected to the Exchange server. Double-click OAB (Default Web Site) and configure the internal and external URLs.
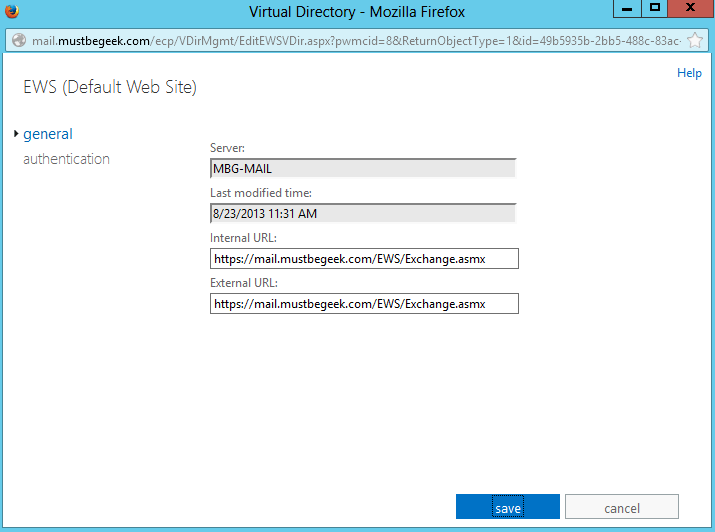
Step 5: Exchange Web Services (EWS)
Exchange Web Services allows for calender sharing and other various options provided by Exchange. To configure URLs, double-click EWS (Default Web Site).
Step 6: Outlook Anywhere
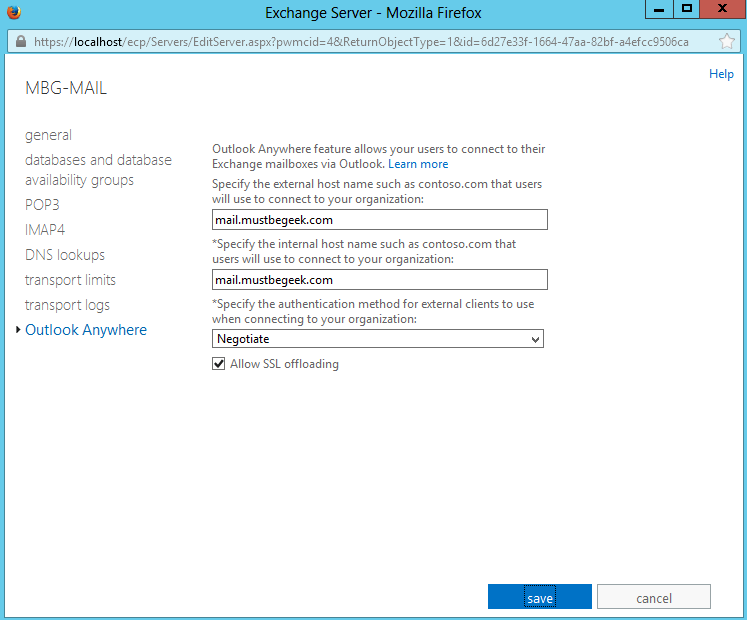
Outlook Anywhere feature lets users out on the Internet to send and receive Exchange emails without requiring a VPN connection to the company network. Office outlook 2007. 2010 and 2013 is used to connect to Exchange server from the Internet. Click servers tab. Double-click the server and select outlook anywhere tab.
Now configure the URLs as shown below and click save.
Step 7: Auto Discover
AutoDiscover feature in Exchange 2013 let’s client application such as Office Outlook 2007, 2010 and 2013 to connect to Exchange server automatically. AutoDiscover feature automatically discovers the mailbox settings for user profile in Office Outlook application. AutoDiscover also works for supported mobile applications. In Exchange 2013, you can configure SCP for AutoDiscover service via Exchange Management Shell. The command below will update SCP (Service Connection Point) object. SCP is active directory object and is used by internal domain-joined clients to retrieve autodiscover URL.
[PS] c:\windows\system32>Set-ClientAccessServer -Identity MBG-MAIL -AutoDiscoverServiceInternalUri https://autodiscover.mustbegeek.com/Autodiscover/Autodiscover.xml
To view the changes type following command in Exchange Management Shell.
[PS] c:\windows\system32>Get-ClientAccessServer | FL AutoDiscoverServiceInternalUri
For external clients you don’t have to configure autodiscover URL as they will try different autodiscover URLs based on combination of user’s email address. In this way you can configure internal and external URLs in Exchange 2013. Now you can configure HTTP to HTTPS redirection for accessing OWA by clients.


